Showing posts with label recipes. Show all posts

2.19.2013

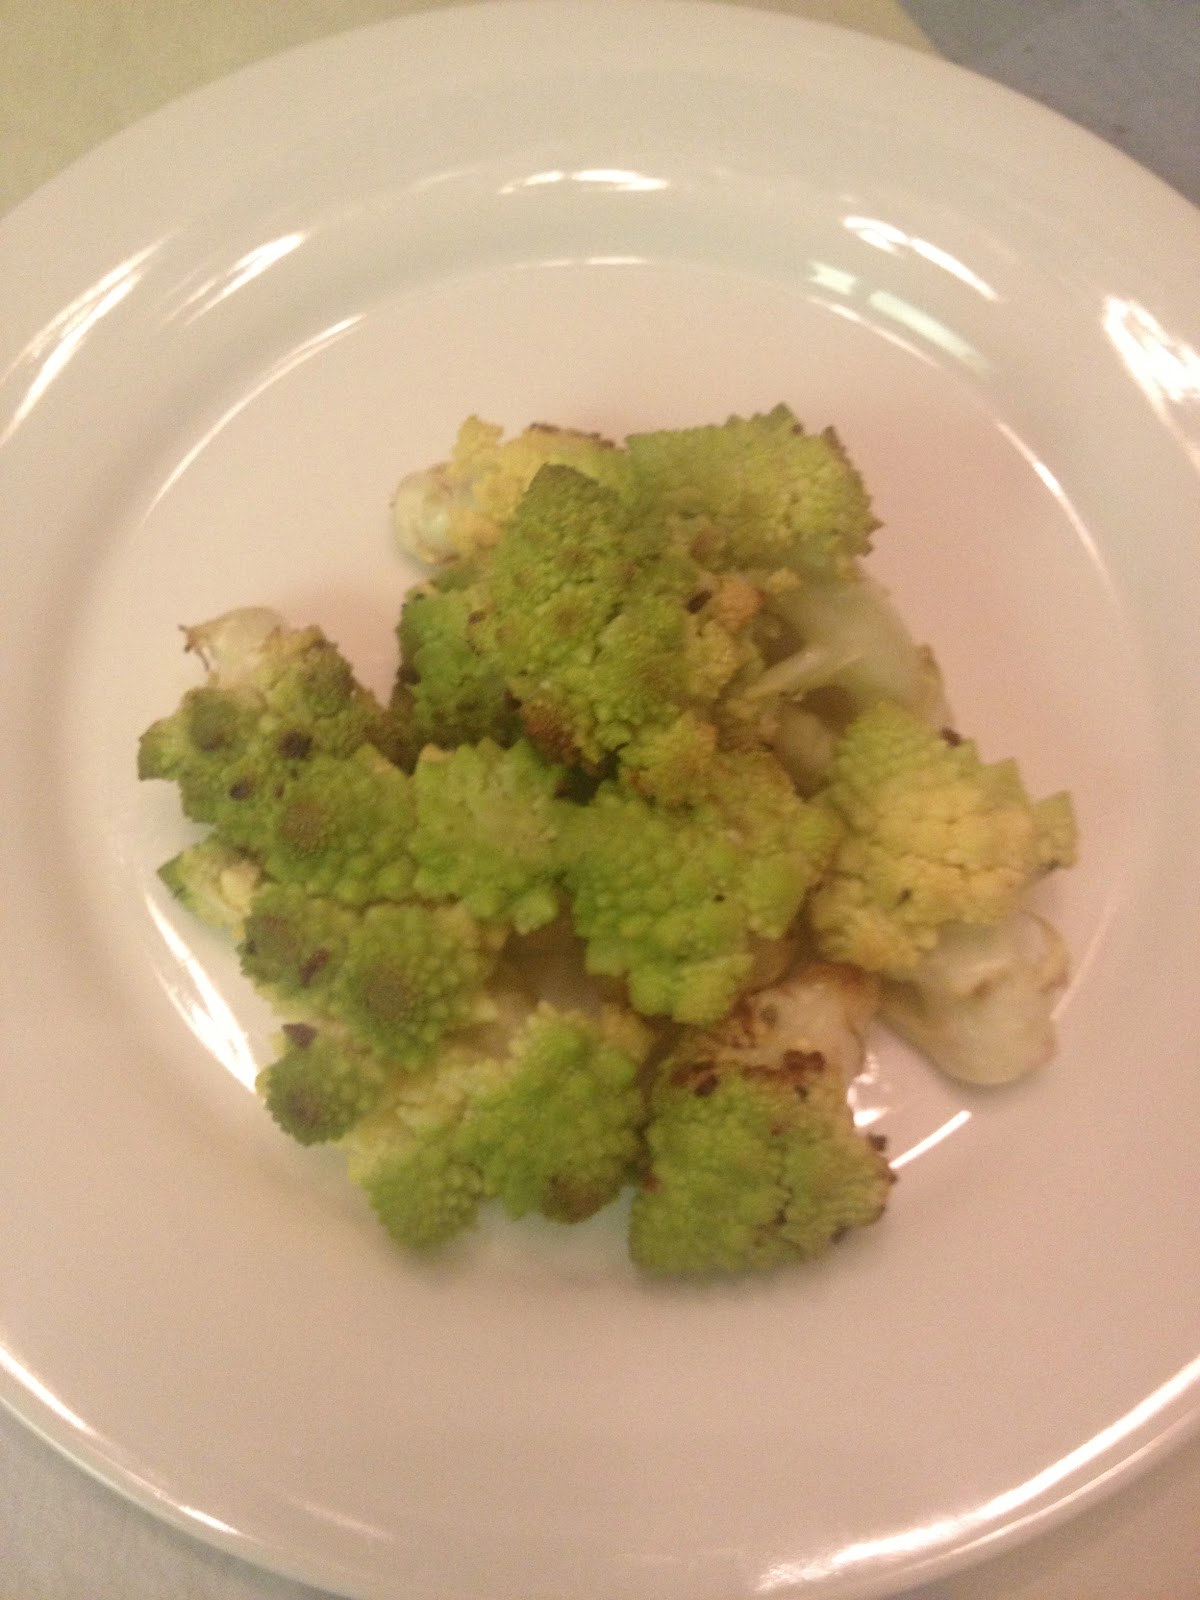
Oven Roasted Romanesco

It seemed so easy.  And it really was.  This slipping in another new item didn't work with the boys this time.  They had some funny comments and descriptions of the veggie, like, look it's a Christmas tree!  Oh if only they knew...  I loved it.  Does it matter what they think? HA

So here's the science stuff:  Romanesco Broccoli, or Roman Cauliflower, is a variant form of cauliflower.  It was first documented in Italy in the 16th century. Available in spring and fall. It is a relatively good source of potassium and dietary fiber, with some protein.  Good eaten raw or roasted!


Oven Roasted Romanesco

2 lb fresh romanesco, cut from the center core into pieces
1 Tbs minced shallot
1 tsp minced garlic
1 tsp minced fresh thyme
2 Tbs EVOO

1.  Preheat oven to 350 degrees.

2. Toss all ingredients together and spread onto a baking sheet.  Bake approx. 20 minutes, giving a toss to the baking sheet during cooking.  Serve!

See, so simple.  The boys will eventually learn!~

Eat happy!
Carolyne

2.17.2013

Fish In Crazy Water

I had a funny conversation with one of my brothers recently.  He is the cook in his house and he has boys too.  He usually asks the kids what they would like for Sunday family dinners and usually makes what they ask for.  Always the same roast beef dinner.  Well of course, they aren't going to ask for something that they haven't been introduced to.  Same thing in my house.  But I love trying new recipes!  With a bunch of boys and their finicky palates, culinary adventures can be tricky.  I usually just slip one new thing in with a bunch of old favorites to see if they'll go for it or not.  Sometimes it works...   

My sweet husband and I decided to stay in for dinner on Valentine's Day. Going out always poses issues for me with the fixed menus so often offered on "holidays."  They don't tend to have gluten free options.  So I went for it.  I tried all new recipes!  I am happy to report - with great success.  

Naturally, my menu was all fresh and mostly Italian.  I found this fish recipe in the March 2013 issue of Food and Wine.  Red Snapper wasn't available at my local Whole Foods market, so I substituted halibut.  I served mine without the bread, of course, and topped it with fresh shaved Grana Padano.  We all enjoyed it.  Hope you do too!!!


FISH IN CRAZY WATER
Pesce All’Acqua Pazza by Marcella Hazan
Food and Wine, March 2013 

Serves 4

1 ½ lbs ripe tomatoes, coarsely chopped, juices reserved
¼ c EVOO
3 large garlic cloves, thinly sliced
2 Tbs minced parsley
1/8 tsp chopped fresh red chili, or to taste
Salt
4 c water
4 red snapper fish fillets, skin on, 6 oz each
4 slices grilled sourdough bread

1.     In a large, deep skillet, combine tomatoes, EVOO, garlic, parsley, chili, pinch of salt & water.  Cover and bring to a boil.  Reduce heat to medium and simmer 45 minutes.
2.     Uncover skillet and bring tomato water to a boil.  Reduce liquid to half.  Add fish, skin side up, and cook for 2 minutes.  Gently lift fillets with spatulas and turn.  Season fish with salt and simmer until cooked through.
3.     Place bread in shallow bowls.  Arrange fish across bread and spoon broth on top.  Serve.

Eat Happy!
Carolyne

1.30.2013

Gluten Free Lemon Ricotta Buckwheat Pancakes


Years ago while in NYC, I had breakfast at Sarabeth’s restaurant.  I have never forgotten the Lemon Ricotta Pancakes.  They were amazing!  So finally, years later, I got off my lazy duff and worked it out – Gluten Free Lemon Ricotta Buckwheat Pancakes.  Oh yes!

Buckwheat is naturally healthy and gluten free.  It has all kinds of health benefits including 8 essential amino acids, manganese, magnesium, 2 flavanoids (quercitin and rutin), & dietary fiber.  Visit the whole grains council site for all the science stuff!

Gluten Free Lemon Ricotta Buckwheat Pancakes
Yield:  approx. 12 medium pancakes

¾ c buckwheat
½ c glutinous rice powder
¼ c tapioca starch
2 T sugar
1 ½ tsp baking powder
¾ tsp baking soda
½ tsp salt
2 eggs
1 c ricotta cheese
1 c milk
juice & zest of 1 lemon

Combine all dry ingredients in a mixing bowl and whisk.  In another mixing bowl, combine all wet ingredients, including lemon zest, and whisk.  Pour wet ingredients into the dry and whisk to combine.  Mixture will be slightly thicker than regular pancake batter. 

Preheat griddle to medium / medium high heat & lightly grease with canola oil or butter.  Pour batter onto hot griddle.  Cook until bubbles appear.  Flip and continue to cook until golden brown.

Serve with maple syrup and fresh blueberries.

Eat happy!
Carolyne

P. S.  I made these pancakes this past Saturday at the Social Justice Learning Institute & Tree People Fruit Tree Giveaway.  It was a blast!  They gave away 2000 fruit trees to families & schools in Inglewood, CA.  For more information about the event, please visit their website! http://www.sjli-cp.org


1.27.2012

Fresh as Summer, Even in Winter!

I love the hearty soups and stews of winter but sometimes I just crave the freshness of summer!  For that palate cleansing, fresh fruit and veggie feel of summer produce, we just have to turn to our winter harvests. Oranges, fennel and roasted beets combined in a cool, refreshing salad do the trick!


Salad of Orange, Fennel and Roasted Beets with Candied Pecans
Serves 4

4 oz Butter Lettuce or other Salad Greens
1 fennel bulb, sliced thinly
2 beets, roasted, peeled, sliced
2 oranges, supremed, juice reserved
2 Tbs olive oil
1 tsp sherry vinegar
Salt & Pepper to taste
1/2 c candied pecans

Method:
  1. Drizzle sliced beets with sherry vinegar.  Set aside.
  2. Peel and segment the oranges, reserving the membranes & juice.
  3. In large bowl, add lettuce, fennel, orange segments, beets and pecans.  Drizzle with olive oil.  Squeeze membranes over salad to release juice and add any reserved juice.  Season with salt & pepper to taste.  Toss and adjust seasonings as necessary.

To Roast Beets:
  1. Preheat oven to 350°
  2. Trim stem ends of beets and place in oven proof dish.  Add water to cover bottom.  Cover tightly with foil or lid; place into oven.
  3. Roast 30 minutes to 1 hour, or until tender when pierced with knife. Cool.
  4. Peel skins off with paring knife, peeler or fingers. Keep refrigerated until use.

To “Candy” Pecans:
  1. Preheat oven to 300°
  2. Sprinkle pecans in even layer on baking sheet.  Roast in oven approx. 10 minutes.  Allow to cool.
  3. In mixing bowl, drizzle with olive oil.  Sprinkle salt & cinnamon sugar on pecans & toss.
Eat happy!
Carolyne

6.15.2011

Chocolate Brownies

Wow, spring semester at school kept me busy, almost too busy!  Now that it's summer, I have been extremely fortunate to begin an externship with a fab restaurant in Hollywood that specializes in sustainable farm-to-table faire.  I'm learning so much each day - it's really exciting!  Still, I'm hoping to return to my own GF kitchen and test new recipes to share with everyone.  

I was recently approached by a swim mom who is new to the GF lifestyle.  One baked goodie that she really wanted was brownies.  Who could blame her???  After trying many, some good, some great, some not-so-much, I have my own.  I tested my recipe on a bunch of kids and friends at a dinner party.  My friends just couldn't believe that they were gluten free.  Isn't that the point?  Delightfully fudgy and yummy.  Hope you enjoy!   

CHOCOLATE BROWNIES

1 c butter, plus extra for baking dish
8 oz bittersweet chocolate (Scharffen Berger’s 70%)
5 eggs
3 c sugar
1 Tbs vanilla
1 tsp salt
1 c sweet rice powder / flour, plus extra for baking dish
¼ c potato starch
¼ c tapioca starch
1 Tbs cornstarch
1 tsp guar gum

  1. Preheat oven to 350°F.  Grease a 9x13 pan with butter, then flour with sweet rice powder.
  2. In double broiler, melt chocolate and butter over low heat, stirring occasionally.  Remove from heat and set aside.
  3. In large mixing bowl, beat eggs, sugar and vanilla until light and fluffy, approx. 5 -7 minutes.  With mixer on low speed, mix in melted chocolate.
  4. In separate mixing bowl, blend together flour, starches, salt and guar gum.  Add to egg / chocolate mixture until just combined.
  5. Pour mixture into prepared pan.  Bake until puffed and almost set, approx. 45 minutes.  Center will still be slightly moist, yet edges will begin to pull from sides of pan.
  6. Cool slightly and serve.
Always yummy with fresh berries and whipped cream!

Eat happy,
Carolyne

3.31.2011

Southwestern Style Pork Stew


I love Mexican food.  And for the most part, it is naturally gluten free!  As long as you stick to the corn tortillas and freshly made stuff.  This is one of my family's favorite dishes - my version of Chili Verde.  My husband says that he likes it even better as leftovers.  Served with rice and beans, salad too, it's an easy dinner!  

Southwestern Style Pork Stew

3.5 – 4 lb. boneless pork shoulder, trimmed & cut into cubes
2 Tbl vegetable oil
2 red onions, large sliced
1 white onion, large sliced
6 cloves garlic, minced
1 14oz can fire-roasted tomatoes with chilis
1 7oz. can diced green chilis*
3 Tbl ground cumin
2 Tbl fresh oregano, chopped
1 tsp ground chili pasilla
Salt and Pepper
Cilantro
Lime wedges
Tortillas*

  1. In a dutch oven, cook pork with 1/3 cup of water over medium-high heat, covered and stirring occasionally, for 15 – 20 minutes.   Uncover, increase heat to high and cook until liquid has evaporated, approx. 20 -30 minutes.
  2. Remove pork from dutch oven and keep aside.  Pour off excess rendered pork fat, keeping 3 Tbl in pan.  If not enough rendered pork fat liquid is left, add oil.
  3. Reduce heat to medium.  Add onions, garlic, and cumin, stir and cover.  Cook until onions are soft, approx. 8 minutes.
  4. Return meat to pan along with any accumulated juices.  Add tomatoes, chilis, oregano and chili pasilla.  Bring to a simmer, cover and cook until fork tender, approx. 1 ½  to 2 hours.  Season with salt and pepper.
  5. Heat tortillas.
  6. Serve with warm tortillas, and garnished with cilantro and lime wedges.
Tips:  If you prefer to use fresh chilis, use 1 lb. Anaheim or poblano chilis.  Cut off stems, slice in half, remove seeds and roast in hot oven until blistered.  Let cool and peel skins.  Lots of work!  And the chilis can be very expensive compared to buying canned.  Works either way!

Heating Tortillas:  This can be done in a number of ways -  using a damp towel in a tortilla warmer and heated in the microwave, or in a hot sauté pan on the stove top.  Microwave yields a moister, hot tortilla, whereas the stovetop method yields a drier, crispier version

Eat happy!
Carolyne

3.28.2011

Good Ol’ Collard Greens and then Some!

Growing up in the south, collard greens were available at any BBQ joint worth its salt.  I just never seemed to try them.  I hate to think of all the yummy greens that I missed during those years.  Miss them no more!  My CSA has had them in my farm box off & on throughout the winter months.  Collards and a mixture of different types of greens and I just LOVE them!  Even my boys like them.  My friend Susan doesn’t seem to agree.  If this recipe doesn't do the trick, maybe she’ll hand hers over to me!

Greens, Southern Style

a bunch o’ greens – collards and a mixture  of beet tops, chard, mustard, turnip...
3 – 4 slices of bacon, cut into small bits (applewood smoked is the best)
1 onion, chopped
4 cloves garlic, chopped
water or chicken stock to cover, approx. 4 cups
red pepper flakes
salt & pepper to taste

  1. Clean your greens!  Rinse well and remove woody or stalky stems.  Cut the thick stems from the collards and large chop all greens into strips.
  2. Brown the bacon in a stock pot.  Add onion and cook until soft and tender.
  3. Add greens, garlic and water or stock to cover.  Season with pepper flakes.  I like a little kick but not too much, so I use about a teaspoon. 
  4. Cover.  Simmer. Simmer some more, 'til tender.  It takes about and hour or more.  Season with salt & pepper to taste.  I like mine a bit salty.
  5. Enjoy!

Eat happy!
Carolyne

3.11.2011

Family Dinner with Tuscan Style Roast Chicken

Every Sunday is big family dinner night at my house.  Friends join us each week as we share the cooking, dining, wine and conversation!  Last week, we enjoyed Tuscan Style Roasted Chicken with sauteed asparagus, potato galette and mixed green salad with an orange sherry vinaigrette.  Yum!  I had a few requests on Twitter to share the chicken recipe, so here you go! 


Tuscan Style Lemon Roasted Chicken
 serves 4

1 whole chicken, 4 -5 lbs.
1 lemon, cut in half
1 sprig fresh rosemary, whole
1 sprig fresh rosemary, chopped
2 whole cloves of garlic
3 cloves garlic, minced
2 Tbl olive oil
1 tsp kosher salt
fresh ground pepper

  1. Preheat oven to 400°.
  2. Remove giblets from chicken, rinse and pat dry.  Place in roasting pan.
  3. Put ½ lemon in chicken cavity with 2 cloves of garlic and sprig of rosemary.
  4. Truss chicken.
  5. Squeeze remaining half of lemon over chicken.
  6. Pour olive oil, rosemary, garlic, salt & pepper over chicken and rub.
  7. Place chicken, breast side down, in roasting pan and into the oven. 
  8. Roast 45 minutes.  Turn chicken breast side up.  Continue to roast 30 - 45 minutes, basting every 10 minutes.
  9.  Chicken is done when instant read thermometer inserting into breast reaches 160°.  Remove from oven and loosely cover with foil.  Allow chicken to rest.  
  10.  Carve, serve & enjoy! 
A few tips...  
I cook whole poultry breast down the first part of roasting to allow the natural juices to settle into the breast meat.  This helps to maintain more moisture in the breast and still allows the skin to roast and crisp when turned up.

Chicken is considered cooked at 165°.  Carryover cooking occurs when removing it a little early from the oven and allowing to rest. Resting the meat allows for the juices to be redistributed and absorbed throughtout prior to carving.

Trussing keeps the legs firmly against the body and allows for more even cooking.  


Eat happy!
Carolyne

3.09.2011

The Chocolate Chip Cookie War: Chewy vs. Crunchy???

Batch after batch of gluten free chocolate chip cookies, I tried to find the “perfect” recipe, one that could pass for the “real thing” with all the kids, big and small.  I tested many different recipes, using guar gums or xanthum gums, baking powder or baking soda, salted butter or unsalted butter, and differing quantities of everything. It became the Cookie War, Chewy vs. Crunchy!  In my recipe showdown, it came down to one thing – the flour used.

For you crunchy cookie lovers, use the rice flour combo.  This gave the cookie more rise, crisper texture, good flavor and aroma, yet the mouthfeel still had a bit of the grittiness associated with rice flours. 

And for you chewy cookie lovers, use the sorghum flour combo.  The sorghum flour adds an earthy aroma & flavor, no grittiness in the mouthfeel, and cooks faster.  Either way, this recipe won approval from all my tasters.

So here’s the scoop – I am giving it to you BOTH ways!

Gluten Free Chocolate Chip Cookies

¾ cup brown sugar
¾ cup Evaporated Cane Juice Sugar
1 cup butter, softened to room temperature
1 tsp. GF vanilla
2 eggs

Rice Flour Combo                 OR                  Sorghum Flour Combo
1 ½ cup glutinous rice flour                        2 cups Bob’s Red Mill GF Flour
1 cup Bob’s Red Mill GF Flour                     ½ cup sorghum flour

1 tsp baking soda
1 tsp salt
1 tsp guar gum
¼ tsp cream of tartar
2 cups semisweet chocolate chips
1 cup milk chocolate chips

  1. Preheat oven to 375.°
  2. Cream sugars and butter.   Add vanilla and mix. 
  3. Combine flours, baking soda, salt, guar gum & cream of tartar.  Sift together.  Add to sugar/ butter mixture.  Mix at low speed until crumbly.
  4. Add eggs, beat until light and fluffy.
  5. Add chocolate chips and stir.
  6. Using a #40 scoop (3/4 oz), drop dough 2 inches apart onto a baking sheet lined with a silicone mat.
  7. For Rice Combo, bake approx. 13 minutes.
  8. For Sorghum Combo, bake approx. 9 minutes.
  9. Cool cookies on baking sheet before removing to cooling rack. 
  10.  Enjoy!

Take our poll!  Which do you prefer, Chewy or Crunchy???

Eat happy,
Carolyne